 by
by When it comes to maximizing the capabilities of your mini excavator, selecting the right attachments is crucial. Among the various tools available, the ripper stands out as an essential implement for breaking up hard soil, shale, and rocky terrain. This article will delve into the critical factors to consider when choosing a ripper for your mini excavator, including types, applications, and maintenance tips.
Understanding Rippers: An Overview

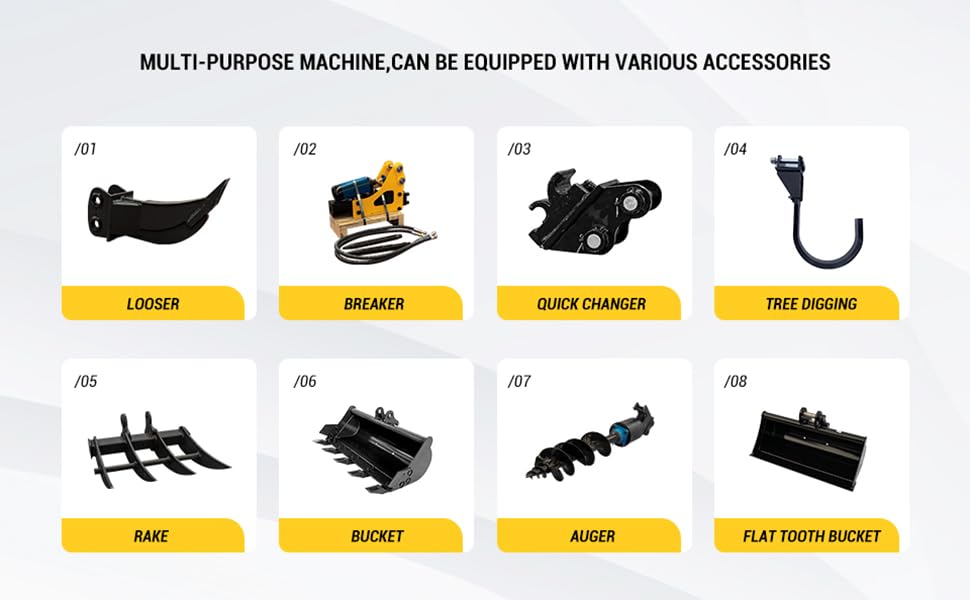
A ripper is a powerful attachment designed for breaking through tough ground conditions. It typically consists of a pointed, robust shank that penetrates the earth, allowing for easier excavation and site preparation. Rippers come in various designs and sizes, making it essential to match them with the specifications of your mini excavator.
Types of Rippers for Mini Excavators
There are several types of rippers available, each tailored for specific applications. Understanding these variations will help you make an informed decision.
- Single Tooth Rippers: Ideal for breaking hard ground, these rippers feature a single, elongated tooth that penetrates deep into the soil. They are perfect for tough excavation tasks.
- Multi-Tooth Rippers: Equipped with multiple teeth, multi-tooth rippers are designed for faster and more efficient soil disruption. They are suitable for larger projects where speed is essential.
- Rock Rippers: Specifically designed for breaking through rocky terrain, rock rippers have reinforced teeth and a more robust construction to withstand the harsh conditions.
- V-Rippers: These rippers feature a V shape that allows for improved penetration and material displacement. They are versatile and can be used for various applications, including land clearing and site preparation.
Factors to Consider When Choosing a Ripper
Selecting the right ripper involves several important considerations. Here are some key factors to keep in mind:
- Excavator Size: Ensure that the ripper is compatible with the size and weight of your mini excavator. An oversized ripper can strain the machinery, while an undersized one may not deliver the required performance.
- Soil Conditions: Assess the type of soil you will be working with. Sandy soils may require a different ripper than clay or rocky soils. Consider the ripper’s tooth design and material to ensure it can handle the specific conditions.
- Project Requirements: Determine the scope of your project. For heavy-duty tasks, a single or rock ripper may be necessary, while smaller jobs might benefit from a multi-tooth ripper.
- Brand Compatibility: Ensure that the ripper is compatible with your excavator brand. Many manufacturers offer specific attachments that are designed to work seamlessly with their machines.
Case Studies: Successful Applications of Rippers

To illustrate the importance of selecting the right ripper, consider the following case studies:
Case Study 1: Residential Land Clearing
A contractor working on a residential land clearing project faced challenges with rocky terrain. By using a rock ripper attachment on their mini excavator, they successfully broke through the rock and prepared the site for further excavation. The project, which initially seemed daunting, was completed ahead of schedule and under budget due to the efficiency of the ripper.
Case Study 2: Road Construction
A highway construction company needed to prepare a site with various soil conditions. They opted for a multi-tooth ripper that allowed them to quickly break up both clay and sandy soils. The versatility of the attachment not only increased productivity but also reduced labor costs, as fewer workers were needed to complete the task.
Statistics on Ripper Performance

Several studies have highlighted the performance benefits of using rippers on mini excavators:
- A study conducted by the National Institute of Construction found that using a ripper can increase excavation efficiency by up to 30% in hard soil conditions.
- Research from Equipment World showed that projects utilizing rippers reduced site preparation time by an average of 25%, allowing for faster project turnover.
- According to a survey of contractors, 85% reported increased productivity when using the appropriate ripper for their specific soil conditions.
Maintenance Tips for Ripper Attachments
To ensure the longevity and effectiveness of your ripper, proper maintenance is essential. Here are some maintenance tips:
- Regular Inspections: Frequently inspect the ripper for signs of wear and tear, especially the teeth. Replace worn teeth promptly to maintain effectiveness.
- Cleaning: Keep the ripper clean by removing dirt and debris after each use. This helps prevent rust and ensures optimal performance.
- Lubrication: Regularly lubricate the moving parts of the ripper to reduce friction and wear.
- Storage: Store the ripper in a dry, protected area to prevent damage from the elements.
Choosing the right ripper for your mini excavator is a crucial decision that can significantly impact the efficiency and success of your projects. By understanding the various types of rippers available, considering critical factors such as excavator size and soil conditions, and learning from real-world applications, you can make an informed choice that meets your specific needs.
Additionally, maintaining your ripper through regular inspections and proper care will ensure it continues to perform at its best. With the right attachment, you can enhance your mini excavator’s capabilities and tackle even the toughest excavation challenges with ease.


